Assignment 3 planning part 3

For my second planning visit I utilised the anticipated settings I outlined in Assignment 3 planning part 1

These settings outlined below were how I set my Nikon D7200 with Sigma 10-20mm lens:

  • ISO 400 – 800
  • f/5.6 – f8
  • 1/500s
  • Lens 10-20mm (15mm)
  • Hand held
  • Multiple shots

The link to the contact sheets for my 2nd scouting visit is below:

2nd Scouting Visit Contact Sheets

I must admit to being somewhat disappointed with the results. My aim in using the wide angle lens was to try and encompass the majority of the junction so that the status of the traffic lights could be seen as well as the junction activity. Whilst I could see the junction fairly well the action and activity was too small to be useful. I need to use a longer focal length and concentrate on a smaller part of the action for the images to be worthwhile.

Also on reflection I may need to try a few different areas of pedestrian congestion around the Waterloo Station area. This may necessitate a 3rd scouting visit, before I can get any useful images. Although I work close to the chosen area work is always manic, but I must make the time.

Assignment 3 planning part 2

I popped out at lunchtime to take some test shots of the junction using my Fuji X30 to see if they looked ok. The contact sheets of these test images are below:

Lightroom (DSCF0063.dng and 41 others)Lightroom (DSCF0063.dng and 41 others)Lightroom (DSCF0063.dng and 41 others)Lightroom (DSCF0063.dng and 41 others)

For this to work my shots need to take in the traffic lights so that it can be clearly seen when they are red or green. Although I intend to use a pretty wide-angle lens (10-20mm) with my Nikon D7200 when I take my shots, it is clear that I will need to carefully position myself to gain the best field of view. The proof of the pudding will be when I try the wide angle lens. This will probably require a few visits to the junction to get the kind of shots I am aiming for, and maybe just a bit of Henri-Cartier Bresson’s luck.

Assignment 3 first impressions and planning part 1

First Impressions

The concept of a ‘Decisive Moment’ made me think on something that has puzzled me for some considerable time, why do some cyclists take unnecessary risks like:

  • Ignoring red traffic lights at junctions
  • Undertaking large vehicles as they approach turning points
  • Not wearing cycle helmets
  • Wearing personal stereos and therefore unable to hear traffic (i.e. large vehicle turning announcements)
  • Thinking that the highway code is not applicable to them

Or any combination of the above, in turn; risking their own lives, those of other pedestrians or the mental distress caused to drivers who unwittingly hit, injure or kill these cyclists.

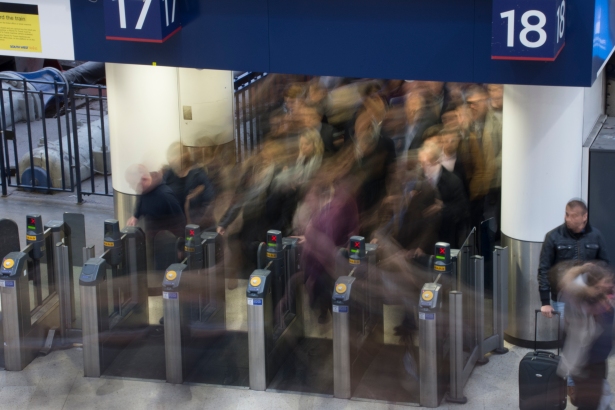
There are a couple of junctions close to my work where this kind of blatant action is common, especially early in the morning and early evening during rush hour. But also at time of quietness which brings its own level of complacency.

Sometimes we experience problems or situations in life where we feel like we are standing at a busy junction where the traffic lights are not working. Where we are unwilling witnesses to potential accidents and no matter how much we wave our arms, we are ignored. This is how feel about these irresponsible cyclists. We live in enlightened society where we are taught about danger from birth, therefore these cyclists must make a conscious decision (their own decisive moment) to take any or all the risks I have highlighted above.

The word cloud below shows the words that come to my mind when thinking about the issues highlighted above:

Decisive Moment Word Cloud

Planning Part 1

My idea is to take images at the junction of Stamford Street and Cornwall Road (London, SE1 9HN) at various times. I will try to take images from various points that take in the whole junction. Google map and satellite view of the junction below (Google.co.uk, 2017):

Junction 1

Map of junction of Stamford Street and Cornwall Road – London, SE1 9NH

Junction 2

Satellite view of junction of Stamford Street and Cornwall Road – London, SE1 9NH

I am not anticipating a crash or near miss, but I could end up witnessing an accident! The junction has pedestrian crossings which may also provide other interesting shots. My intention is not to make myself too obvious by; using natural cover, distance, muted clothing and slow movements. Hopefully catch my intended targets off guard.

Shooting from an elevated or low point might produce interesting images, but could attract more attention. Shooting from midriff might work best. Set camera up manually possibly try using a 10 – 20mm wide angle lens, using a good depth of field and use hyperfocal distance to ensure that everything of interest is in focus (Dofmaster.com, 2017).

Hyperfocal

Anticipated initial manual camera settings:

  • ISO 400 – 800
  • f/5.6 – f8
  • 1/500s
  • Lens 10-20mm (15mm)
  • Hand held
  • Multiple shots

The above give me a starting point for this assignment.

Reference

Google.co.uk. (2017). Cite a Website – Cite This For Me. [online] Available at: https://www.google.co.uk/maps/@51.5057334,-0.111333,19.25z [Accessed 17 Apr. 2017].

Dofmaster.com. (2017). Online Depth of Field Calculator. [online] Available at: http://www.dofmaster.com/dofjs.html [Accessed 17 Apr. 2017].

Assignment 2 Feedback

Tutor feedback for Assignment 2 – ‘Collecting‘ below:

EYV2_Perry_Tatman

I am glad that my tutor thinks that this project has potential. There are potentially 3 or 4 threads I could expand on or distil from the images that I have taken to create a more meaningful body of work. As my tutor advises this may involve another station shoot to nail it.

She point to my difficulty with completing some exercises. I do find is hard sometimes to ‘marry up thought with deed‘ with regard to the given exercises. The problem children in this part of the unit involved people images, and my wife wasn’t willing to be my stooge! However these exercises are not forgotten and will be completed by the end of EYV.

I have tried to make it to OCA Study Visits and also some visits of my own. I still need to write up a couple of these up. I have also been going to the Thames Valley group meetings, and found them to be very inspiring and motivating.

My tutor is also right in that I should keep notebooks for ideas and potential projects. My handwriting is awful, but I will try and make a better effort to keep visual notes; doodles, drawings, mind maps, lists etc. These I can then scan or take pictures of to add to my Learning Log, along with some more reflective content as to how I feel and develop as I progress.

She was also kind enough to provided me with a very comprehensive reading list to help me further this project:

  • Many Are Called by Walker Evans
  • Compression Tokyo by Michael Wolf
  • Subway Commuters by Bruce Dickinson
  • Simon Terrill is an artist interested in crowd theory
  • Priests by Giacomelli
  • Non-Place by Marc Auge

I need to progress with Part three, but I will try my best to review and improve this project towards a more conclusive end. My camera club has its annual exhibition in May and I intend to submit a Theme Print Panel based on this project.


Project 1: The distorting lens – Exercise 2.5

Exercise 2.5
Find a subject in front of a background with depth. Take a close viewpoint and zoom
in; you’ll need to be aware of the minimum focusing distance of your lens. Focus on
the subject and take a single shot. Then, without changing the focal length, set the
focus to infinity and take a second shot.

The closer you are to the subject, the shallower the depth of field; the further from
the subject, the deeper the depth of field. That’s why macro shots taken from very
close viewpoints have extremely shallow depth of field, and if you set the focus at
infinity everything beyond a certain distance will be in focus.

As you review the two shots, how does the point of focus structure the composition?
With a shallow depth of field the point of focus naturally draws the eye, which goes
first of all to the part of the image that’s sharp. It generally feels more comfortable if
the point of focus is in the foreground, although there’s nothing wrong with placing
the point of focus in the background.


These two images were taken at the end of my road. The first focusing on the top nodule of a post box. This sharply focuses on the foreground and throws the background out of focus. The Second focusing on infinity puts the background in focus and throws the foreground out of focus.

They were all taken with:

  • Aperture priority
  • ISO 100
  • f/5.0
  • Fujifilm X30 equivalent 35mm focal length of:
    • 56mm
road-short-focus

Post box and up the road – Short focus

road-long-focus

Post box and up the road – Long focus

I can see that playing with the point of focus will effect the depth of field. This will be a useful technique to limit or restrict attention to elements within the image.

Project 2: Lens work – Research point

Research point
Do your own research into some of the photographers mentioned in this project.

Look back at your personal archive of photography and try to find a photograph that
could be used to illustrate one of the aesthetic codes discussed in Project 2. Whether or
not you had a similar idea when you took the photograph isn’t important; find a photo
with a depth of field that ‘fits’ the code you’ve selected. The ability of photographs to
adapt to a range of usages is something we’ll return to later in the course.

Add the shot to your learning log and include a short caption describing how you’ve
re-imagined your photograph.


Looking at the six recommended photographers, I selected one who demonstrated images with a deep depth of field and one who demonstrated images using a shallow depth of field.

First I looked at the work of Fay Godwin, especially those challenging the environment. I chose the image below from her work and one from my own that also shared a large depth of field and was also challenging what I had witnessed:

Fay08

“Countryside of Brassington Derbyshire” – Fay Godwin

Fly Tip

Fly Tipping – Perry Tatman

For my shallow depth of field example I was attracted to the work of Mona Kuhn. In particular the use of a tilt-shift effect that provided a sliver of shallow focus. My attempt at this type of shallow focus follows:

MK_GrandFalls_2013

“Grand Falls”  – Mona Kuhn

Lynmouth

“Lynmouth, Devon” – Perry Tatman

Reference

Imgc.allpostersimages.com. (2017). [online] Available at: http://imgc.allpostersimages.com/images/P-473-488-90/70/7033/JYDL100Z/posters/fay-godwin-countryside-of-brassington-derbyshire.jpg [Accessed 27 Mar. 2017].

Monakuhn.com. (2017). MONA KUHN. [online] Available at: http://www.monakuhn.com/collections/view/private-series/ [Accessed 27 Mar. 2017].


Project 1: The distorting lens – Exercise 2.7

Exercise 2.7
Use a combination of small apertures and wide lens to take a number of photographs
exploring deep depth of field. Because of the small apertures you’ll be working with
slow shutter speeds and may need to use a tripod or rest the camera on a stable
surface to prevent ‘camera shake’ at low ISOs. Add one or two unedited sequences,
together with relevant shooting data and an indication of your selects, to your
learning log.

Achieving deep depth of field might appear easy compared to the difficulties of
managing shallow depth of field. We’re surrounded by images made with devices
rather than cameras whose short focal lengths and small sensors make it hard
to achieve anything other than deep depth of field. The trick is to include close
foreground elements in focus for an effective deep depth of field image. Foreground
detail also helps to balance the frame, which can easily appear empty in wide shots,
especially in the lower half. When successful, a close viewpoint together with the
dynamic perspective of a wide-angle lens gives the viewer the feeling that they’re
almost inside the scene.


The following images using the above settings all taken using a tripod. The deep depth of field creates an acceptable level of focus from the front of the image to the back of the image.

The foreground elements coupled with the receding elements provide layers giving a sense of depth and 3D quality.