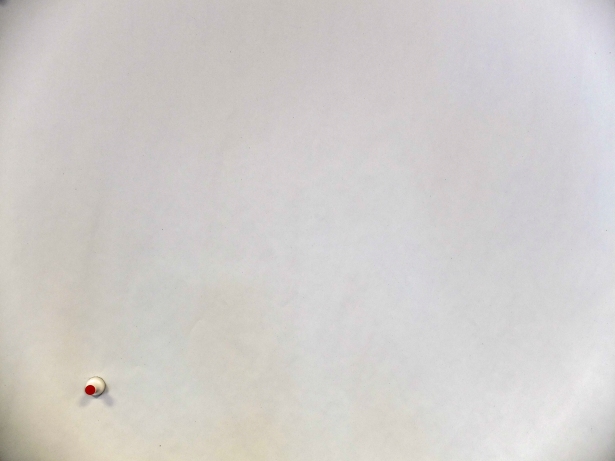
Project 2: Visual Skills – Exercise 1.4

Exercise 1.4 Frame
The final exercise of this project makes use of the viewfinder grid display of a digital
camera. This function projects a grid onto the viewfinder screen to help align vertical
and horizontal lines, such as the horizon or the edge of a building, with the edge of
the frame. If your camera doesn’t have a grid display, imagine a simple division of the
viewfinder into four sections.

Take a good number of shots, composing each shot within a single section of the
viewfinder grid. Don’t bother about the rest of the frame! Use any combination of
grid section, subject and viewpoint you choose.
When you review the shots, evaluate the whole frame, not just the part you’ve
composed. Take the same approach you used to evaluate the point and line
exercises: examine the relationship of elements to the frame. Composition is part of
form and formal analysis will be a useful skill for your exercises and assignments as
you progress through the course.

Formalism: prioritisation of concern with form rather than content. Focus on composition
and the material nature of any specific medium. (Wells, 2009, p.347)
Select six or eight images that you feel work individually as compositions and also
together as a set. If you have software for making contact sheets you might like
to present them as a single composite image. Add the images to your learning log
together with technical information such as camera settings, and one or two lines
containing your thoughts and observations.


Looking at my cameras manuals I found that both were different.

My Nikon D7200 utilises a 4 x 4 viewfinder grid as shown below:

d7200-viewfinder-grid

While my Fujifilm X30 offer two options: a 3 x 3 or a 6 x 4 viewfinder grid as shown below:

x30-viewfinder-grid-9

x30-viewfinder-grid-24

For this exercise I used my Fuji X30 and the 3 x 3 viewfinder grid. I took two series of images, one within Waterloo Station and the other outside the station area. With each series I focused on composing each image in turn in each sector of the viewfinder grid. Each series shows the full image and highlights the frame concentrated on, then the frame image on its own. I finished each series by composing a picture using each selected image in the position they were originally taken.


Series 1:

station-composite

Station Composite


Series 2:

waterloo-composite

Waterloo Composite


My conclusions to this exercise are to consider the whole field of view within the viewfinder when composing your image. It is easy to be suckered into just concentrating on what is at the centre of the frame and not considering what is happening in the foreground, background or edges of the image.

Project 2: Visual Skills – Exercise 1.3(1) & 1.3(2)

Exercise 1.3 (1) Line
Take a number of shots using lines to create a sense of depth. Shooting with a wideangle
lens (zooming out) strengthens a diagonal line by giving it more length within
the frame. The effect is dramatically accentuated if you choose a viewpoint close to
the line.


The images I have taken below demonstrate converging diagonal lines both physical and virtual which give the appearance of depth.

down-to-lynmouth

Image 1: Down To Lynmouth

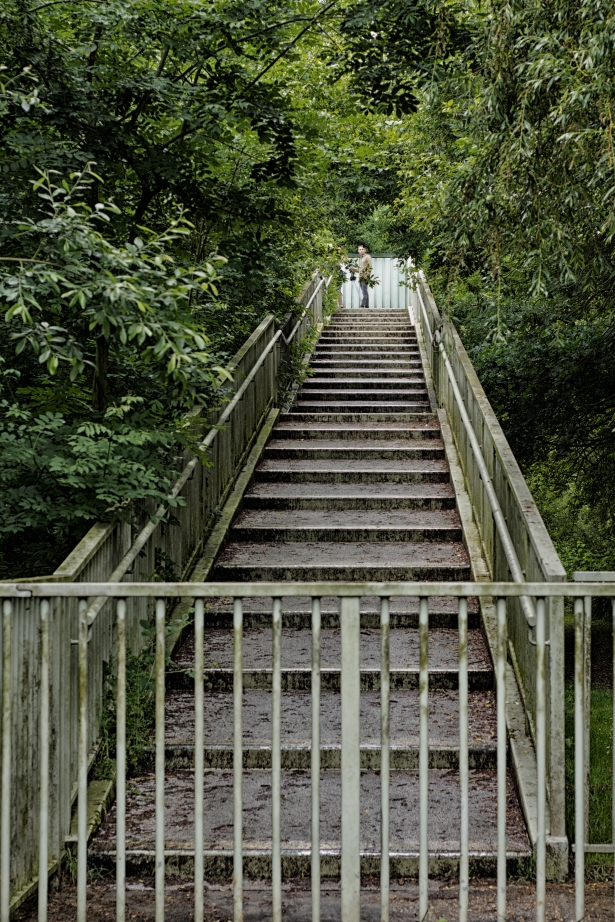
footbridge-1

Image 2: Footbridge

minehead-station

Image 3: Minehead Train Station

track-down-f22

Image 4: Blackwater Line

west-brompton-cemetery-1

Image 5: Brompton Cemetery 1

west-brompton-cemetery-6

Image 6: Brompton Cemetery 2


Exercise 1.3 (2) Line
Take a number of shots using lines to flatten the pictorial space. To avoid the effects
of perspective, the sensor/film plane should be parallel to the subject and you may
like to try a high viewpoint (i.e. looking down). Modern architecture offers strong
lines and dynamic diagonals, and zooming in can help to create simpler, more
abstract compositions.


The images I have taken below demonstrate parallel lines both physical and virtual which leave the frame, promoting a sense of mystery and dynamism.

equator

Image 7: Equator

no-loitering

Image 8: No Loitering

position-closed

Image 9: Position Closed

sea-posts-phone-wires

Image 10: Sea Posts & Telegraph Lines

snail-shell

Image 11: Snails Pace

tower-bridge-1

Image 12: Tourist Rush


Review your shots from both parts of Exercise 1.3. How do the different lines relate
to the frame? There’s an important difference from the point exercises: a line can
leave the frame. For perpendicular lines this doesn’t seem to disrupt the composition
too much, but for perspective lines the eye travels quickly along the diagonal and
straight out of the picture. It feels uncomfortable because the eye seems to have no
way back into the picture except the point that it started from. So for photographs
containing strong perspective lines or ‘leading lines’, it’s important that they lead
somewhere within the frame.


The use of perpendicular lines provide a sense of depth by drawing the viewer; into the distance and out of the picture in the case of images 3 – 6. Where as image 1 draws the viewer down and image 2 leads the viewer up.

While the perspective lines in images 7 – 12, rush the viewer out of the frame, either horizontally, vertically or diagonally. The eye seeks a way back in trying to make an unconscious connection external to the image back into the frame. Diagonal lines add a sense of action to the image.

Project 2: Visual Skills – Exercise 1.2

Exercise 1.2 Point
The point is the most fundamental design element. It has to be small within the frame and its position is generally more important than its form (see the example of the white polystyrene cup underneath the chair opposite).
(Photography 1: The Art of Photography, p.72)
1. Take two or three photographs in which a single point is placed in different parts
of the frame. (A ‘point’ should be small in relationship to the frame; if it’s too large
it becomes a shape.)
How can you evaluate the pictures? How do you know whether you’ve got it
right or not? Is there a right place and a wrong place for the point? For the sake
of argument, let’s say that the right place shouldn’t be too obvious and that
the point should be clear and easy to see. As there’s now a ‘logic’ to it, you can
evaluate your composition according to the logic of the point.
As you look at the pictures you might find that you’re also evaluating the
position of the point by its relationship to the frame.
2. Take a number of images in which a point is placed in relationship to the frame.
Can you find any place where the point is not in relationship to the frame? If it’s
in relationship to the frame you can place a point in any part of the picture and
the picture is balanced.

You could think about the two parts of this exercise in a different way, as ‘test
pictures’ versus ‘real pictures’. The only purpose for the test pictures is the
exercise: you can analyse them according to the criteria and get the expected
answer. But ‘real’ pictures are not so easy to analyse. What are the criteria for
‘relationship’? (We’re hoping that you’ll shoot the rest of the exercises in this
course as real pictures, not test pictures!)
As you review your photographs, observe the way your eye ‘scans’ the surface of the
image. Note how:
• a point attracts attention out of proportion to its size
• the eye looks for connections between two points
• placing a point close to the edge seems to animate both the point and the frame.
Print out two or three of your point photographs and trace the route your eye takes
over the surface with a pencil. Then try the same with a selection of photographs
from newspapers or magazines (or the example above). You should notice that each
photograph seems to have its own tempo. Add the traced photographs to your
learning log together with brief observations.


1. Below are three points within images whose frame encompasses the whole image.

exercise-1-2-image-1-centre

Image 1: Central

This point is perfectly symmetrical within the image. However with no other points of reference to other elements to guide the eyes it appears somewhat static and lifeless.

exercise-1-2-image-2-off-centre

Image 2: Off Centre

This image lacks the symmetry of the central point but challenges the eyes to seek balance. Again with no other points of reference to other elements to guide the eye it makes it hard, but this positioning adds a sense of dynamism.
exercise-1-2-image-3-towards-edge

Image 3: Towards The Edge

Further moving the point away from symmetry  increases the sense of dynamism and also the effect of apparent movement. This would be further accentuated if the image contained other points of reference.

2. Linking points and their position within the frame.

exercise-1-2-points

Image 4: Sheep & Horses

In the above image the eyes and mind seek to join points and to make shapes. It also errs towards grouping items of similar shape, contrast or colour. In the above image the eye groups the two horses as a straight line and the three sheep as a triangle. An additional triangle is also created between the two horses and the closest sheep. The two distant sheep also balance with the horses in the foreground. The sheep also denote depth with the difference in scale between the Sheep in the foreground with those in the distance.

Exercise 1.2 Points 2.jpg

Image 5: A Day By The Beach By Any Means

In this image the eye forms a triangle between the cyclist, the family and the seagull. The image is balanced visually by the cyclist and the family. Also narratively between the push bike and the wheelchair. The offset nature of the seagull adds a dynamic element and draws the eyes upward to the sky.