Project 3: The beauty of artificial light – Exercise 4.3

Exercise 4.3

Capture ‘the beauty of artificial light’ in a short sequence of shots (‘beauty’ is, of
course, a subjective term). The correct white balance setting will be important; this
can get tricky –but interesting – if there are mixed light sources of different colour
temperatures in the same shot. You can shoot indoors or outside but the light should
be ambient rather than camera flash. Add the sequence to your learning log. In your
notes try to describe the difference in the quality of light from the daylight shots in
Exercise 4.2.


When I first read this exercise I wasn’t quite sure how to attack it. I had my Nikon D7200 set to manual and ISO to 800. I used a wide aperture to get shutter speeds fast enough to get acceptable shots handheld. Firstly I tried some shots indoors handheld and then some from the end of my road on my tripod. Examples are shown below:

I was fairly pleased with results shooting in RAW, and setting white balance to fluorescent which gave pleasing results straight from the camera which required minimal post processing.

Thinking about the exercise I was taken with the idea of the loneliness of takeaways during midweek and thought that I might prove to be a good subject. During this shoot I used my tripod and toyed with narrower apertures for greater depth of field knowing that this would require longer shutter speeds. I selected a local parade of shops that offered a variety of takeaways. I took a few test shots to ensure I was on the right track, before getting into better positions for the shots proper. The results are shown below:

Each shot required minor adjustments to aperture or/and shutter speed to get the shot right. Getting this right as best as I could in camera meant (like my test shots) a minimal amount of post processing.

I was very pleased with the final shots and felt that I had been able to get the white balance right, also the voyeuristic look I had planned for with the takeaway views.

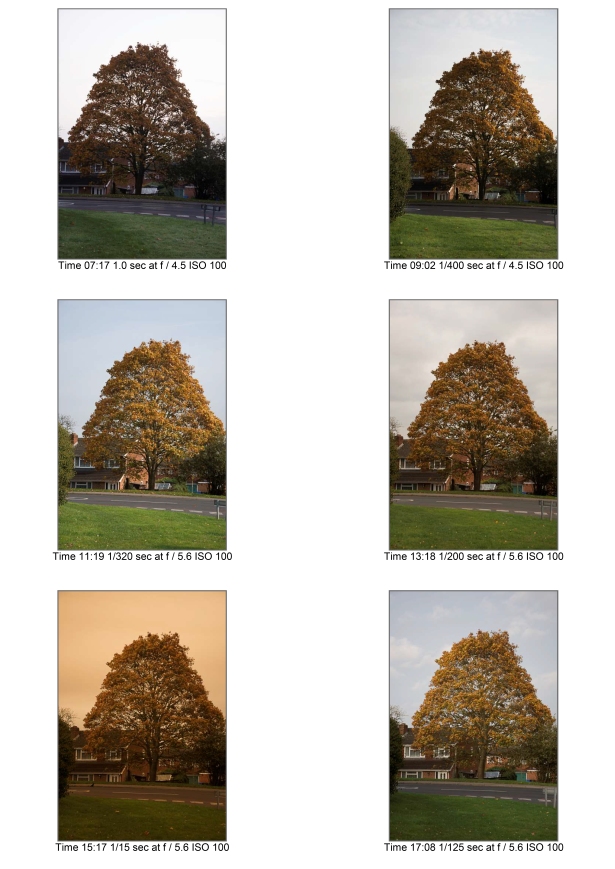
Comparing this exercise to exercise 4.2 we can see that:

  • The quality of light with natural light will vary depending on factors such as time of day and weather. While artificial light such as above is of a fixed quality.
  • With natural light you will need to change your shooting position to vary how light appears on your chosen subject. With the artificial lighting  of the shops the way the light falls is constant and consistant, this is very important to the way the takeaway advertises to its customers.
  • Shots using natural lighting are limited from dawn to dusk. While artificial lighting shots can be taken during the day, but are better taken late evening or night.


Project 2: ‘Layered, complex and mysterious…’ – Exercise 4.2

Exercise 4.2

In manual mode take a sequence of shots of a subject of your choosing at different times on a single day. It doesn’t matter if the day is overcast or clear but you need a good spread of times from early morning to dusk. You might decide to fix your viewpoint or you might prefer to ‘work into’ your subject, but the important thing is to observe the light, not just photograph it. Add the sequence to your learning log together with a timestamp from the time/date info in the metadata. In your own words, briefly describe the quality of light in each image.


For this exercise I decided to take images of a rather large tree close to my home. I looked at the online tool ‘The Photographers Ephemeris‘ to see which direction the sun would rise and set. The results are shown below.

TPE Monday 17th Oct 2017

Monday 16th October 2017

I decided to take images at 2 hour intervals from about 07:00 to about 17:00. I used my Nikon D7200 with 70 – 140mm lens and set on my tripod in portrait orientation. The camera was set to:

  • Manual mode
  • ISO 100
  • Focal length 48mm
  • Aperture f/4.5 – f/5.6
  • Shutter speed varied to attain balanced exposure

The weather forecast was supposed to be mixed due to the aftermath of hurricane Ophelia. The results of the images are shown below:

Lightroom (_PRT7982.dng and 5 others)

From all the images it can be seen that the quality of the light changes through the day. My personal favourite of the set is tha one taken at 17:08, after the wind cleared the sky and provided a warm and fairly soft light.

Natural light is a beautiful thing but can as this experiment shows be moody and unpredictable. Whilst wonderful images can be obtained but these are at the cost of time, energy and potential (probably regular) disapointment. But it is probably the unpredictability of this form of light that attracts certain people who revel in the results of a cocktail of cercumstance no matter how well planned.

Please note: In the image taken at 15:17 had sky had pinkish/orange hue which was due (I found out after) to debris in the atmosphere caused by hurricane Ophelia.

Reference

The Photographer’s Ephemeris (2017) Sunrise & sunset information for Monday 16th October 2018 [Online App]. Available at http://app.photoephemeris.com/?ll=51.335694,-0.788661&center=51.3358,-0.7902&dt=20171016211900%2B0100&z=18&spn=0.00,0.01 (Accessed 15 October 2017).


Project 1: Exposure – Exercise 4.1

Exercise 4.1

1. Set your camera to any of the auto or semi-auto modes. Photograph a dark tone (such as a black jacket), a mid-tone (the inside of a cereal packet traditionally makes a useful ‘grey card’) and a light tone (such as a sheet of white paper), making sure that the tone fills the viewfinder frame (it’s not necessary to focus). Add the shots to your learning log with quick sketches of the histograms and your observations.

You might be surprised to see that Histogram 1
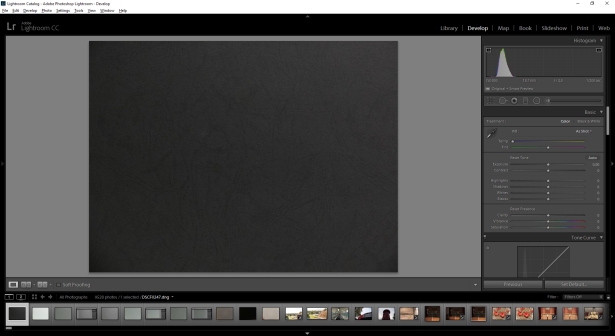
the histograms for each of the frames – black, grey and white – are the same. If there’s not much tonal variation within the frame you’ll see a narrow spike at the mid-tone; if there is tonal variation (such as detail) you’ll see a more gentle curve. If you find the tone curve isn’t centred on the mid-tone, make sure that you have your exposure compensation set to zero. You may see an unpleasant colour cast if you’re  shooting under artificial light, in which case you can repeat the exercise using your monochrome setting (a light meter is sensitive to brightness, not to colour).

This simple exercise exposes the obvious flaw in calibrating the camera’s light meter to the mid-tone. The meter can’t know that a night scene is dark or a snow scene is light so it averages each exposure around the mid-tone and hopes for the best. But why can’t the camera just measure the light as it is? The reason is that a camera measures reflected light – the light reflected from the subject, not incident light – the light falling on the subject. To measure the incident light you’d have to walk over to the subject and hold an incident light meter (a hand-held meter) pointing back towards the camera, which isn’t always practical. If you did that each of the tones would be exposed correctly because the auto or semi-auto modes wouldn’t try to compensate for the specific brightness of the subject.

2. Set your camera to manual mode. Now you can see your light meter! The midtone exposure is indicated by the ‘0’ on the meter scale with darker or lighter exposures as – or + on either side. Repeat the exercise in manual mode, this time adjusting either your aperture or shutter to place the dark, mid and light tones at their correct positions on the histogram. The light and dark tones shouldn’t fall off either the left or right side of the graph. Add the shots to your learning log with sketches of their histograms and your observations. Switching to manual mode disconnects the aperture, shutter and ISO so they’re no longer linked. Because they’re no longer reciprocal, you can make adjustments to any one of them without affecting the others.

Histogram 2


  1. I performed this exercise in my workplace that has daylight equivalent lighting using grey card from the back of a note pad, white paper and black card used for binding documents.The results are as follows:
Grey Auto

Grey card using aperture priority

White Auto

White paper using aperture priority

Black Auto

Black card using aperture priority

As the brief predicted the histograms for the three images are all close to the mid tone values. Also as can be seen the images for the white and the black are more grey than their true colours.

  1. The exercise is repeated with my Fuji X30 in manual mode. Below are the same three images with adjustments made to shutter speed (whilst maintaining constant aperture of f4 and ISO 800) to adjust exposure to correct for camera metering:
Grey Manual

Grey card using manual setting adjustment zero stops exposure

White Manual

White paper using manual setting adjustment +2 stops exposure

Black Manual

Black card using manual setting adjustment -2 stops exposure

As can be seen the manual adjustments to exposure produce results with truer colours. Therefore one has to be aware of the limitations of the cameras light metre in these type of situations, and to use the histogram as a tool to guide you towards correcting the exposure to produce a correct image.