Study Visit : Gregory Crewdson – Cathedral of the Pines

I must admit a certain amount of excitement in my looking forward to this study visit to the Photographer Gallery in London to see Gregory Crewdson’s Cathedral of the Pines. Up until then I had only seen his work in books or online, and had been very impressed. For an artist credited with massive image work I felt that you had to be able to view it in person to be able to really appreciate his work.

This is the first time that The Photographers Gallery has devoted all 3 of its gallery spaces to one artist. This is I think a great statement of respect to Crewdson’s work.

After meeting up with OCA Tutor Jayne Taylor and the rest of the group in the ground floor cafe we proceeded to the galleries with the plan of meeting back at the lobby for 13:00. Most of the group started at the gallery on the 2nd floor, while I decided to start at the 5th floor and work my way down.

All the images appeared to be approximately the same size around 3′ high and 4′ wide. This I felt worked well for the size of the galleries allowing a good initial viewing distance of 7′ to 8′, allowing the viewer to drink in the images. Though the pictures have such attention to detail that one is invited and drawn closer to inspect further in an attempt to decode their meaning. On closer inspection each image has a wonderful painterly quality.

Crewdson’s masterful productions are more akin to a film production that what most people would call photography. In each image the lighting is so balanced and there is nothing in the frame that Crewdson doesn’t want there, it is almost like a single frame of a film frozen. What results is a puzzling vignette left for the viewer to decipher.

My overarching impression of the collection that everyone in it seems to be emotionally detached, a nothingness that is neither happy nor sad. The scenes have the appearance of a form of still life or memento mori, where the entire tapestry of the unfolding act (including the humans) form the elements of the still life.

There is a considerable amount of nudity or partial dress, principally in the women in the images. Whether this stems from a sense of the confidence of isolation, lack of observers, expressing uninhibited personal freedom, expressing vulnerability or just plain not caring at all. These decision seem to be left for the viewer to try and figure out. Kind of jarring at times and with no guidance, one wonders if the nudity is just gratuitous.

Interaction between the protagonists within the scenes is clearly not there, and even when physically close each seems to have their own focus of attention. These people are charged with an emotional detachment, lonely but not lonely, sad but not sad, like empty vessels. Those scenes where it hints of some kind of intimacy or sex, there seems to be no happiness, joy or excitement.

As I mentioned earlier you are drawn into the details within the image searching for clues to make sense of the tableaux. There are plenty of them, for example; a dusty handprint on the thigh of a sleeping man in ‘The Pickup Truck’, a wooden crutch under the bed of ‘Father and Son’, plus numerous visibility of prescription drugs, underwear and other hidden treasures.

Once we had all viewed the collection we decamped to a pub near Carnaby Street, the Red Lion. Here we discussed as a group (for about an hour) the exhibition and the questions it left us with. This was a very valuable part of the study visit and everyone felt able to participate.

In conclusion I want to say that I enjoyed this collection very much and thoroughly recommend it to anyone. These study visits are important as we get a chance to interact with fellow students and peers under the guidance of an OCA Tutor. I look forward to more study visits like this one in the future.

Project 3: What matters is to look – Exercise 3.3

Exercise 3.3

  1. What do the timeframes of the camera actually look like? If you have a manual
    film camera, open the camera back (make sure there’s no film in the camera
    first!) and look through the shutter as you press the shutter release. What is the
    shortest duration in which your eyes can perceive a recognisable image in bright
    daylight? Describe the experiment in your learning log.
  2. Find a good viewpoint, perhaps fairly high up (an upstairs window might do)
    where you can see a wide view or panorama. Start by looking at the things
    closest to you in the foreground. Then pay attention to the details in the middle
    distance and, finally, the things towards the horizon. Now try and see the whole
    landscape together, from the foreground to horizon (you can move your eyes).
    Include the sky in your observation and try to see the whole visual field together,
    all in movement (there is always some movement). When you’ve got it, raise your
    camera and take a picture. Add the picture and a description of the process to
    your learning log.

  1. Unfortunately the only film camera I have is a Nikon EM, which is an aperture priority semi automatic 35mm film camera. With the back open the shutter speed automatically defaults to 1/1000 sec and all that can be perceived is a brief flash of light. The only other speed settings are bulb (shutter stays open as long as the shutter button is depressed) and manual 1/90th sec setting for using a non TTL flash. Even when set to 1/90th sec the flash of light from the shutter is slightly longer but I am still unable to perceive a recognisable image. So the shutter speed would have to be a lot slower for me (personally) to be able to distinguish an identifiable image other than a vague shape. Maybe as slow as 1/2 sec or 1/4 sec. Without having the camera capable of setting these shutter speeds I am making only rough assumptions which for an experiment is not good enough.

2. Looking out of the study window I perceived the:

  • flat roof
  • caravan
  • driveways
  • cars
  • trees
  • roads
  • houses
  • telegraph pole & lines
  • sky

Taking in the whole scene there appears to be some natural framing and negative space. There is no wind so there is no movement in the trees and the clouds also have no distinguishable movement in the bright sky. I listen and hear a car door slam down the close and its motor start. From that I know it must come out of the close in front of me. I raise my camera to focus on the space between the two trees near the entrance to the close. I press my shutter as the car moves through this framing as shown below.

Out the study window

I believe that the purpose of this exercise is to help us to attune ourselves to our surroundings and to gain a level of spacial awareness that helps us to detect and act on movement within our peripheral vision. But for me it is not just sight but sound (as in the sound of the car, or people talking, sound of the wind in the trees etc.) and a level of gut feeling. All this Henri Cartier-Bresson called luck, but for me he was a man with amazing spacial awareness and sensitivity to his surroundings that borders on a 6th sense.

A link to my handwritten notes on my opinion of the Decisive Moment is below:

Notes on the Decisive Moment 

Project 2: A durational space – Exercise 3.2

Exercise 3.2
Start by doing your own research into some of the artists discussed above.
Then, using slow shutter speeds, the multiple exposure function, or another
technique inspired by the examples above, try to record the trace of movement
within the frame. You can be as experimental as you like. Add a selection of shots
together with relevant shooting data and a description of your process (how you
captured the shots) to your learning log.


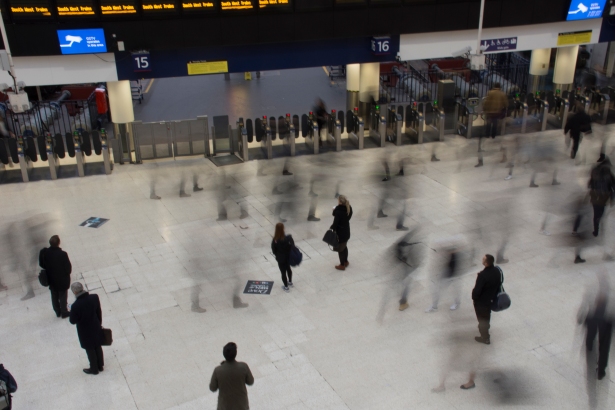
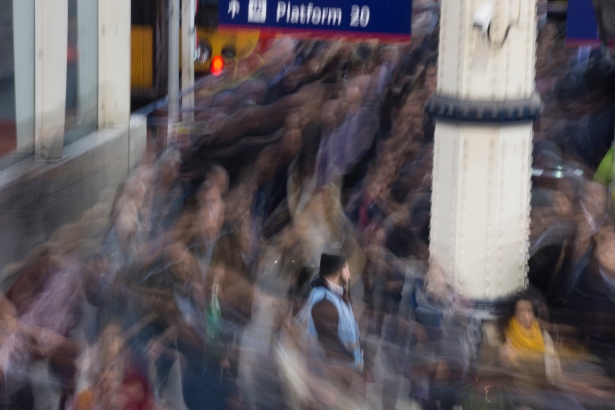
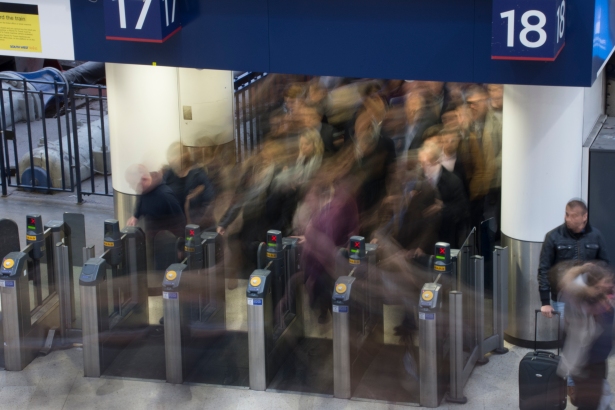
As part of Assignment 2 I took a number of images around Waterloo station in which I was attempting to capture images that evoked the chaotic movement of commuter crowds. The following images were all taken handheld due to the restrictions regarding tripods within Waterloo Station. I tried various combinations of; height, angle, focal length and exposure. I think that the images evoke movement and provide the traces of time I was attempting to create.

Blur 1

Blur 1 – Focal Length 450mm, ISO 400, Exposure 2 sec at f/22

Blur 2

Blur 2 – Focal Length 123mm, ISO 400, Exposure 2 sec at f/22

Blur 3

Blur 3 – Focal Length 123mm, ISO 400, Exposure 2 sec at f/22

Blur 4

Blur 4 – Focal Length 90mm, ISO 400, Exposure 1 sec at f/22

Blur 5

Blur 5 – Focal Length 217mm, ISO 400, Exposure 2.5 sec at f/22

Blur 6

Blur 6 – Focal Length 450mm, ISO 400, Exposure 1/15 sec at f/6.3


Project 1: The frozen moment – Exercise 3.1

Exercise 3.1

Using fast shutter speeds, try to isolate a frozen moment of time in a moving subject.
Depending on the available light you may have to select a high ISO to avoid visible
blur in the photograph. Try to find the beauty in a fragment of time that fascinated
John Szarkowski. Add a selection of shots, together with relevant shooting data and
a description of your process (how you captured the images), to your learning log.


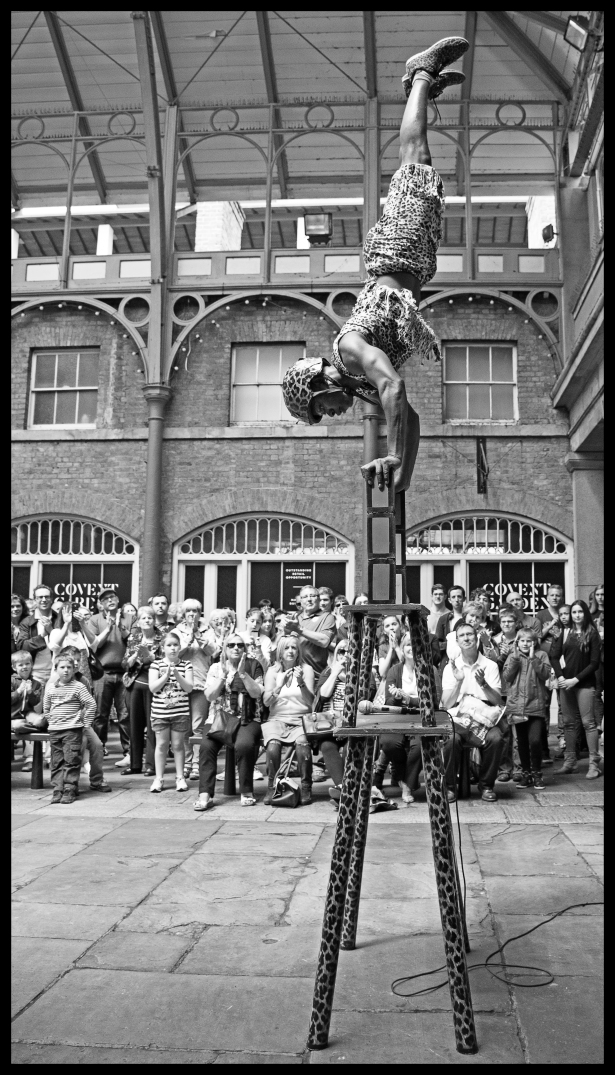
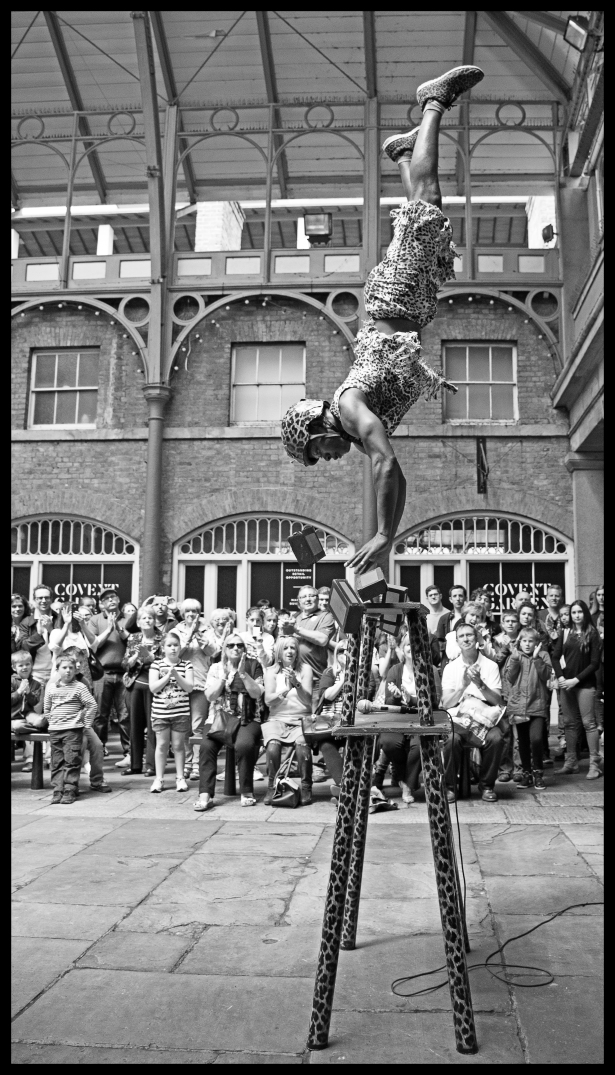
The following series of 3 images were taken at covent garden during the performance of a street artist. I was lucky to have a seat and be able to carefully use my tripod discreetly.

The 2nd of the three really captures the action but  the 1st and 3rd provide context and the series works really well as a triptych.

artist 1

Artist 1 – Focal Length 27mm, ISO 800, Exposure 1/1000 sec at f/4.0

artist 2

Artist 2 – Focal Length 27mm, ISO 800, Exposure 1/1000 sec at f/4.0

artist 3

Artist 3 – Focal Length 27mm, ISO 800, Exposure 1/1000 sec at f/4.0

Post processing involved aligning and cropping images in photoshop. Followed by conversion to black & white and a few minor adjustments.

Mood board “Square Mile”

I have never used Pinterest before but thought I would try it and create a mood board for Assignment 1 “Square Mile”.

It will be nice to see lots of inspirational images from different photographers together, and hopefully help give me a bit of a idea on how to progress my project.

This is a work in progress and hopefully I will learn to understand and use it effectively in my studies and project work.